What is WALLS & TILES ?
WALLS & TILES is a 3Ds Max scripted plugin with two shader map plugins: Crossmap from VIZPARK and BerconTile from Jerry Ylilammi. The script extends a vray / standard material with a gui and remote functions to adjust the containing maps BerconTile and Crossmap in multiple layers. This way, it´s very easy to create, adjust and change tiled materials like brickwalls, stone floors, interior tiles, wood tiles and many more.
WALLS & TILES - User Interface and parameters
HEADER
About
The about screen contains information about the version.
Online Help
This dialog contains links to documentation, tutorials and more for Walls & Tiles.

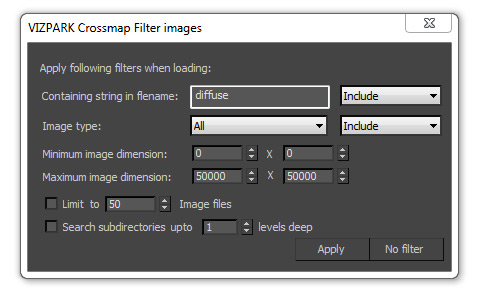
Preferences
In this preferences window you can define the filter settings which the auto-loader should use to filter and assign bitmaps to the layers bump, reflection, diffuse and displacement while loading. If you use "*" as string, the filter will load all bitmaps, if you use "diff" it will load all bitmaps with diff in the names. Currently you can auto-load the formats .jpg / .png / .gif / .bmp / .tga / .tif .
Default Library Path
This path will be the path that is preselected in the load bitmaps dialog window. Once selected and stored it remains stored until you change it again.
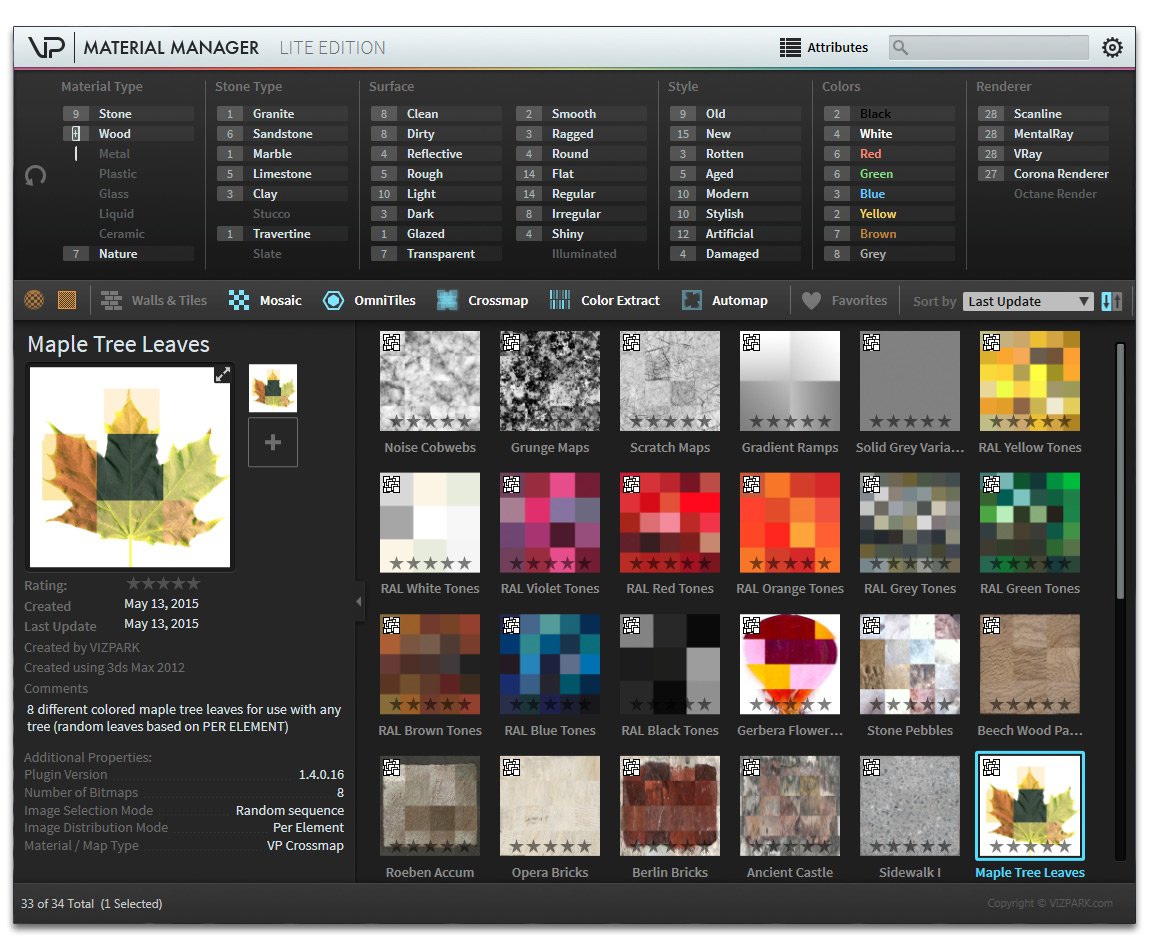
Walls & Tiles Library and Material Manager

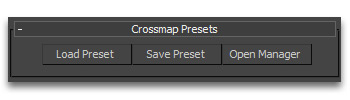
Load Preset
Load Preset will open the Material Manager in WALLS & TILES MATERIAL MODE. This means, only Walls & Tiles material presets will be shown. Double click or LOAD on the bottom right corner will load the preset and it´s bitmaps.
Save Preset
Save Preset will save a Walls & Tiles material preset into the Material Manager. The included bitmaps are also saved, as well as a map thumbnail (600 x 600 pixel) that will be rendered during this process.After saving the files and rendering the thumbnail, Material Manager will open, so you can define attributes for the preset.
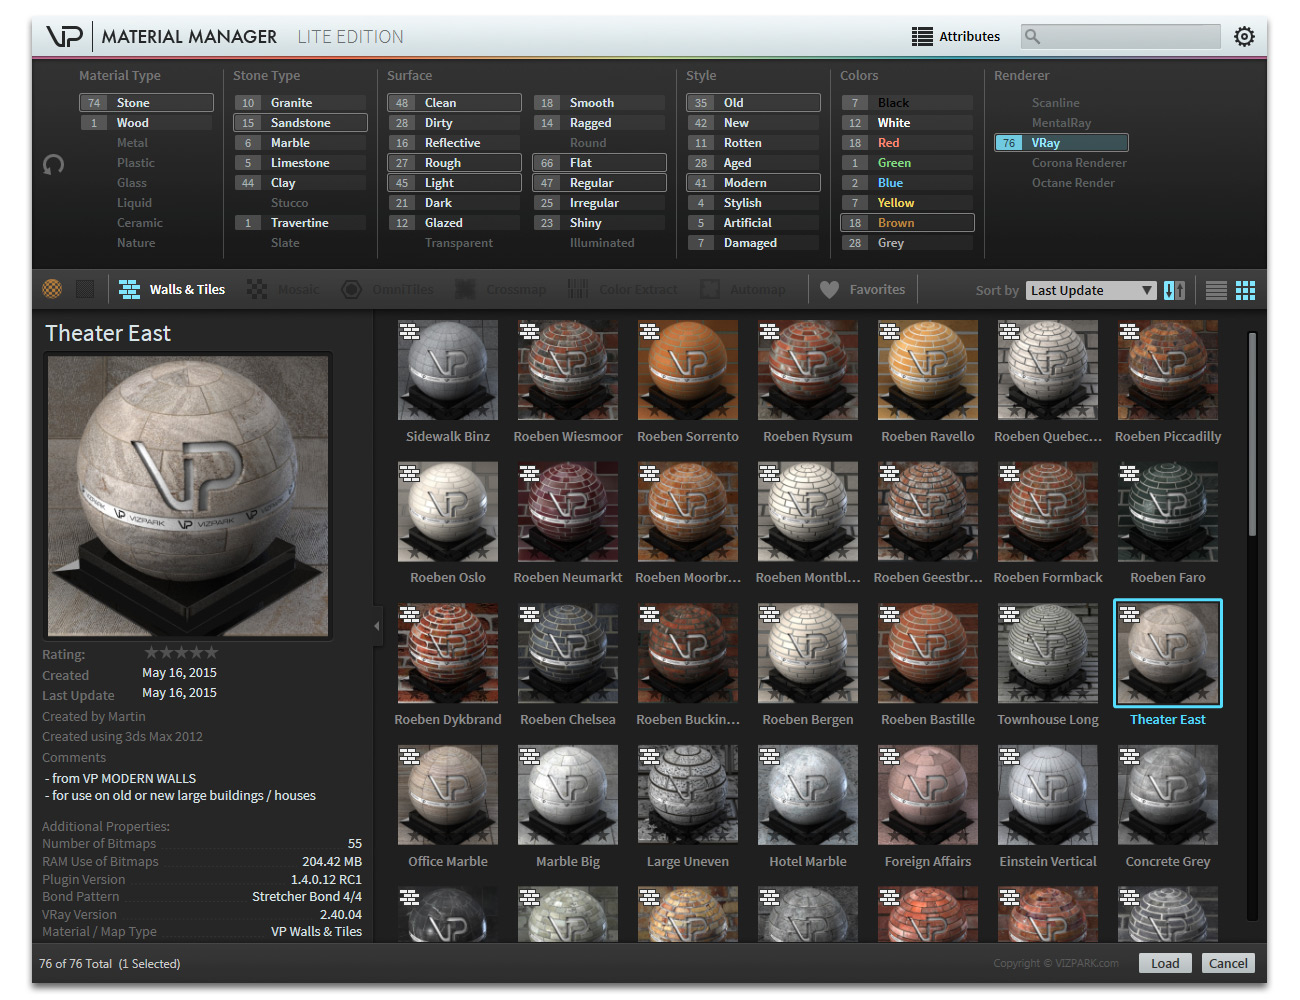
Open Manager
Open Manager will open Material Manager in general mode that shows ALL available presets stored in Material Manager and it´s database.
Further information about Material Manager can be found in the Material Manager Documentation:
Material Manager Documentation
Walls & Tiles Statistics

This new statistics rollout is meant to be an informational help to better understand RAM use and resolution when using Walls & Tiles instead of normal bitmaps.
Number Bricks/Tiles in map
This value shows the total count of bricks / tiles in the complete map. Example: If you set 10 rows with a ratio of 1.0, the map will count 10x10 = 100 bricks.
Total number of loaded bitmaps
This is the total count of bitmaps loaded into RAM. Every bitmap counts as one, so 1 diffuse + 1 bump + 1 reflection will result in 3 total bitmaps.
Total RAM use of all bitmaps
While bitmaps stored on harddisk may be small if compressed as jpg, png or other formats, they will use more RAM when loaded, because they are always kept in RAM uncompressed. The Total RAM use is an approximation of all loaded bitmaps and how much RAM they use when loaded. (shown in MegaByte)
Average bitmap resolution
The average bitmap resolution is calculated based on all loaded diffuse bitmaps. If bitmaps with different resolutions are loaded, their average resolution will be shown here.
Virtual full texture resolution
If you are using tile bitmaps with 1000x1000 pixel resolution and you have 10 bitmaps in row with ratio 1.0, the virtual resolution of the complete texture map with Walls & Tiles will be 10.000 x 10.000 pixel. Why is this important ? Because sometimes high resolution textures are needed, for large poster prints or for animations with close ups. So knowing the virtual resolution gives information about how sharp / hires a texture can be and how close you can go with a camera. (shown in Pixel and MegaPixel)
Theoretical RAM use without Walls & Tiles
This value is a theoretical value to see how much RAM a bitmap (without Walls & Tiles) at the above virtual resolution would need.
RAM saved with Walls and Tiles
This value (in % percent) shows how much RAM you save by using Walls & Tiles compared to a normal bitmap at the virtual resolution. Values range from 99.99 % (almost 100% RAM saved) to -xxx %. A value below 0 means that a fixed bitmap would use less RAM compared to the current Walls & Tiles setup. The status LED shows RED if Walls & Tiles uses more RAM than a normal bitmap texture and GREEN, if RAM is saved by using Walls & Tiles.
Render to Maps
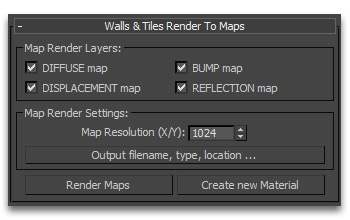
Render to Maps allows to bake maps from your Walls & Tiles material and create new materials quite easily. This can be handy if you feel that the render times are high because of Walls & Tiles or if you would want to use a specific material in VRAY RT or any other GPU renderer. While Walls & Tiles itself is not compatible to GPU renders, the standard materials mostly are, so you can easily create a new standard material from Walls & Tiles and use this for GPU rendering.
Map Render Layers
Here you can choose which layers should be rendered from the material. The checkboxes are selected automatically after loading bitmaps and stay unselected if no bitmaps are loaded. Only layers that are checked will be rendered to maps.
Map Resolution (X/Y) set the pixel-resolution for the maps to render. 1024 means 1024x1024 pixel, so a 1k bitmap for each layer.
Output filename, type, location ... defines the format in which the bitmaps are saved (jpg, png, etc) and where they are saved.
Render Maps
The Render Maps button renders the layers to bitmaps and stores them in your defined location and format.
Create New Material
After renderings the maps, you can create a new material, either placed directly on your selected geometry or as new material in the material editor (you can select the slot). The parameters of your original material (intensities of diffuse, reflection, displacement and bump) will be copied to the new material.
Bitmap Auto-Loader
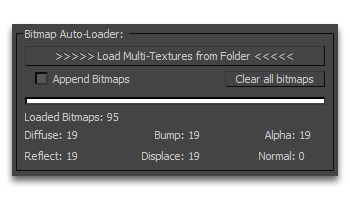
Select Folder
This button will open up a dialog to select a folder containing bitmaps. Depending on the filter preferences, the bitmaps will be loaded and automatically assigned to the corresponding layers for bump, reflection, displace and diffuse. The process bar below shows the loading process and shows a full white bar, if bitmaps are loaded.
Append Bitmaps
If this button is checked, bitmaps are added to the existing bitmaps already loaded. If Append bitmaps is unchecked, the existing bitmaps are cleared and the new bitmaps are loaded instead.
Clear
With this function you can clear all Crossmap maps from bitmaps and empty the layers.
Loaded Bitmaps:
The layers Diffuse, Bump, Reflection, Displace, Alpha and Normal show the current number of loaded bitmaps per layer. The Normal bitmaps are used for the bump channel either alone or in combination with the bump bitmaps. The Alpha bitmaps are used to separate the mortar from the brick to edit the mortar contrast and brightness independent from the bricks.
Bricks / Tiles Infos and Probabilities

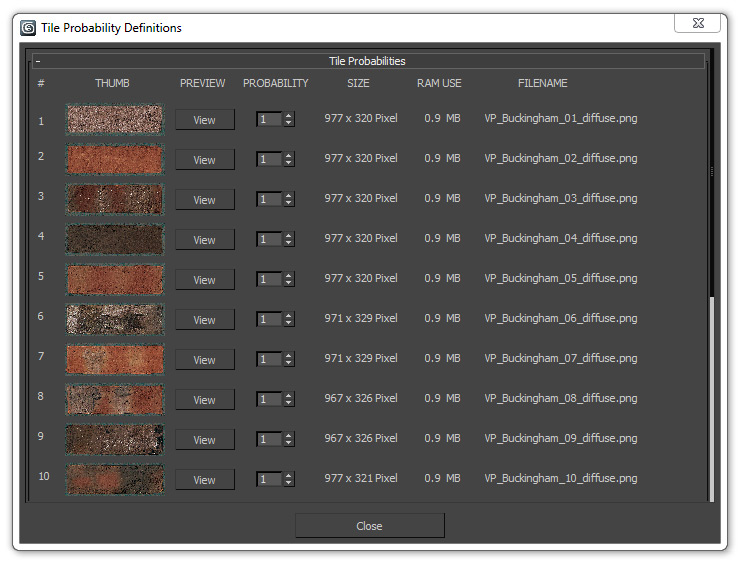
This new dialog window shows a complete list of all diffuse bitmaps, including their thumbails, sizes, RAM use and probabilities.
Thumb
Shows a small thumbnail of each diffuse bitmap.
Preview
Opens a full preview of the diffuse bitmap.
Probability
This value set the probability of each tile based on the diffuse bitmaps. A value of 1 means that the tile has normal probability, a value of 0 means that it should never appear, a value of 5 means that the bitmap should appear 5 times as often as the other bitmaps. (Value range: 0 - 999)
Size
Shows the pixel resolution of the diffuse bitmap.
RAM Use
Shows the approximated memory use of the diffuse bitmap in MegaByte.
Filename
Shows the filename of the loaded diffuse bitmap.
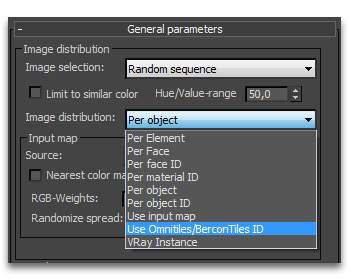
Brick / Tile size

Mapping Type
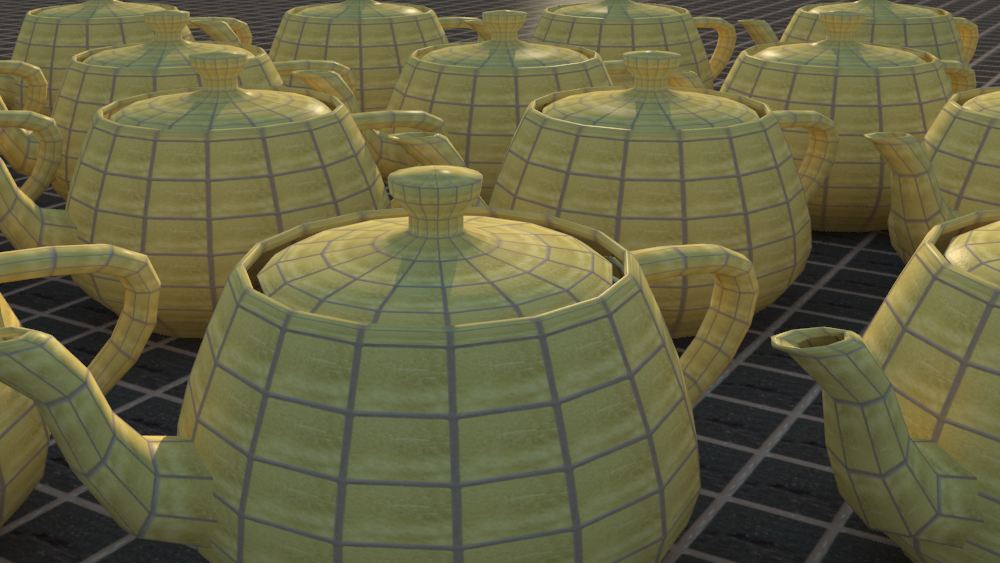
- Real World The advantage of this mode is clearly that all objects which have set the mapping to "Real World Mapping" will have the correct size of the bricks / tiles, no matter which size these objects have. You will not necessarily need to care about proper uv-mapping anymore, if the objects are not scale. This is an easy way to set up large scenes with lots of objects. Only disadvantage of this mode is that the viewport and material previews will not work properly.
- Per Object allows different sizes of the same bricks on different objects. You can define define uv-map-coordinates per object and also have a correct preview in the viewport and material editor. You can enable the preview for the diffuse channel by selecting the diffuse map and activating the preview button.
Brick size X/Y
Here you can define the brick size directly in world units when using Real World mapping. If you use per Object mapping, these parameters are deactivated.
Number of rows
When in per Object mapping mode, you can define the resolution of the wall or floor pattern by setting the vertical number of rows. 10 means that the uv-map will contain 10 rows of the bricks or tiles. This parameter is deactivated in Real World Mapping mode.
Aspect Ratio
Here you can define the aspect ratio for the tiles. It also updates the aspect ratio when defining the Brick sizes. A value of 1.0 means a perfect square, a value of 2.0 means X is 2 times the size of Y. 0.5 means X is half size of Y.
Automatic Size
The Automatic Size button will try to calculate the correct number of rows for your object, based on the defined size of your brick/tile and the uv map size dimensions of your object. If your object does not have a uv map, Walls & Tiles will assign a uv map modifier to your object with a box mapping (perfectly square) so that the calculation will be correct for your object. In case you already use a uv map modifier with non-square dimensions, please adjust the dimensions to equal x, y and z or adjust the rows and aspect ratio manually.
Automatic Ratio
The Automatic Ratio button is very handy when you don´t know the exact ratio of your bricks. If turned on, the ratio will be automatically calculated based on the width and height of all diffuse bitmaps. When bitmaps have different aspect ratios, the average of all diffuse maps will be calculated. You can turn this function off by changing the ratio parameter to a different value than the auto-ratio value.
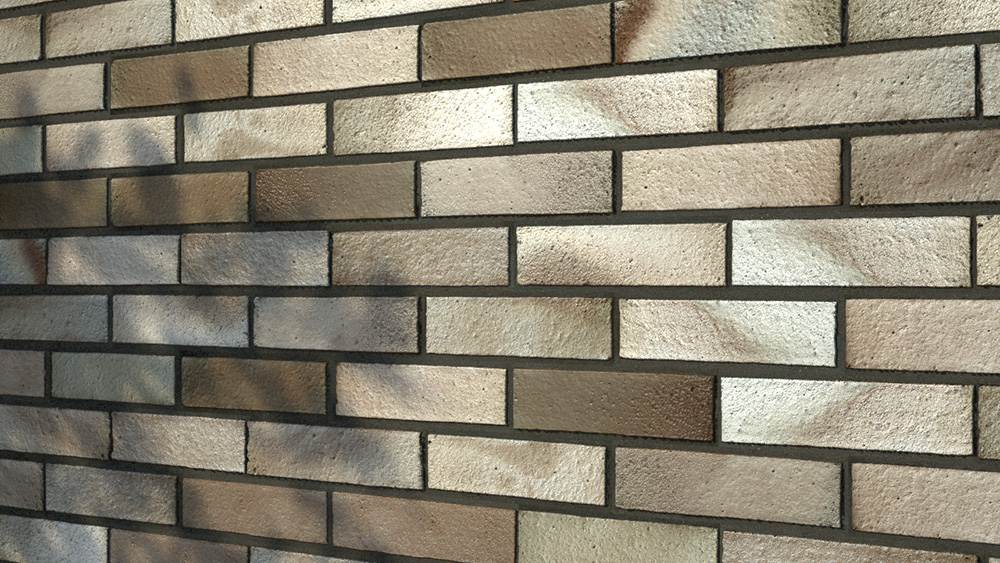
Bond Patterns
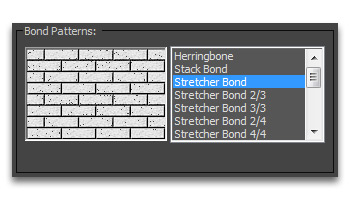
Bond Patterns
The following table show 16 different bond patterns for walls and tiles of different kind. The patterns include:
Custom Bond Pattern

Custom Bond Patterns
This new feature in version 1.1 allows the creation of custom bond patterns based on a simple number definition.
Format
A custom pattern is defined by rows: row1 / row2 / row3 / ...Each row has a definition for offset, brick height, and several brick widths. ( Example: 0,1,1/0.25,0.5,1,0.5/-0.5,1,0.25,0.5,0.125 )
ROW Format
Each row (beginning at the bottom) is defined in this format: offset, height, width1, width2, width3, ... , while each parameter is depending on the defined Brick size (width) and (Height) that is defined in the Walls & Tiles Brick / Tile size.
Offset
A positive offset ( 0.5 ) will shift all rows by 50% width. A negative offset ( -0.25 ) will shift EVERY row by additional 25% width.
Height
A value of 1 sets the row to 100% height, a value of 0.5 to 50% height and a value of 2 to 200% height.
Width(s)
The first number (width1) sets the width of the first brick/tile, the second number (width2) of the second brick/tile and so on. Depending on how many widths you define, the pattern will repeat 1,2,3 or more widths.
Custom Bond example 1

0,.5,0.25,.5/0.125,.25,.5,0.25
Custom Bond example 2

0,1,0.5,0.5/0,0.5,1/0,0.5,1
Custom Bond example 3

0,1,1/0.25,.5,.5/.125,.25,.25/0,.5,.5
Custom Bond example 4

-.25,1,1/0,.5,.75/.5,1.5,.75/-.25,1,1/0,.5,.75/.5,1.5,.75/0,.5,.75/-.25,1,1/.5,1.5,.75/0,.5,.75
Edges / Mortar
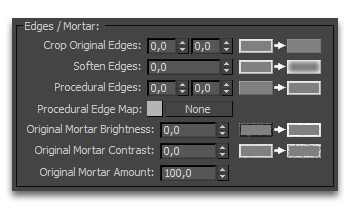
Crop original Edges
This parameter will cut off the edges of each tile from 0% to 100%. When cropping the edges, the bitmap in each tile will be automatically scaled to fit the bond pattern. Width (X) and height (Y) of the edges can be cropped independently.
Soften Edges
The Soften Edges parameter will add soft-edges to each brick / tile. The edges between the tiles will have the color set below.
Procedural Edges
This parameter adds procedural edges to the tiles with the color set below. Width (X) and height (Y) of the procedural edges can be changed independently.
Procedural Edge Map
If a map is loaded, the color has no influence and the edges / mortar is defined by the map alone. If not map is used, the color defines the color of the procedural edges.
Original Mortar Brightness
This parameter changes the brightness of the mortar between the bricks. It is ONLY available when Alpha maps are loaded that separate the mortar from the bricks.
Original Mortar Contrast
This parameter changes the contrast of the mortar between the bricks. It is ONLY available when Alpha maps are loaded that separate the mortar from the bricks.
Original Mortar Amount
With this value you can blend between the original mortar from the diffuse bitmaps and the procedural mortar (either as the mortar color or a map if used). The value range is from 0-100 while 0 means procedural mortar only and 100 means original mortar only. It is ONLY available when Alpha maps are loaded that separate the mortar from the bricks.
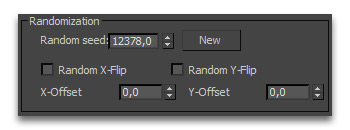
Positioning
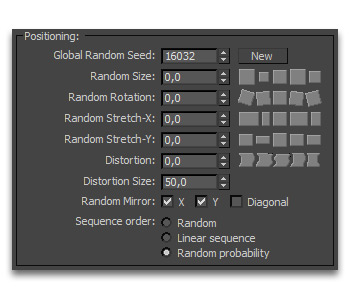
Global Random Seed
Setting a new random seed will randomize the bitmap distribution and other randomization settings.
Random Size
Random size will randomly scale the bitmap up, but not down.
Random Rotation
Random rotation will rotate each tile randomly.
Random Stretch-X
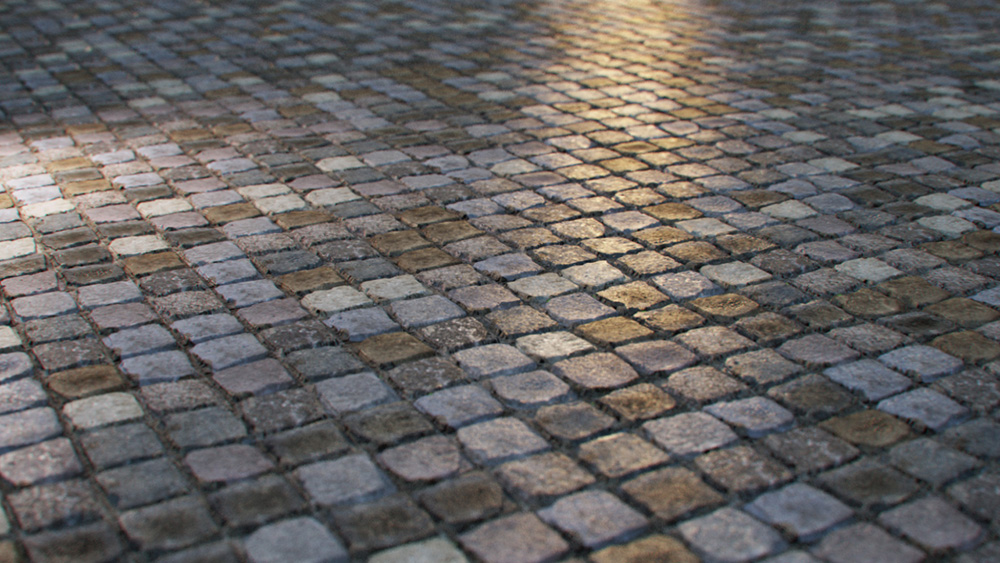
This parameter will stretch and squeeze each tile. Settings this parameter to 50 or higher will result in a nice random tiles, good for cobblestones for example.
Random Stretch-Y
This parameter will stretch and squeeze the complete rows up and down, but not the individual tiles.
Distortion
The Distortion parameter will distort the complete map based on a noise map. The value sets the distortion strength.
Distortion Size
The Distortion Size sets the size / granularity of the noise distortion. Lower values will distort with more fine detail, higher values will distort the map on a larger scale.
Random Mirror
This parameter will randomly mirror each tile by the X-axis and/or Y-axis. Diagonal mirroring will rotate a tile by 90° (diagonal mirror) but will disable the random rotation parameter.
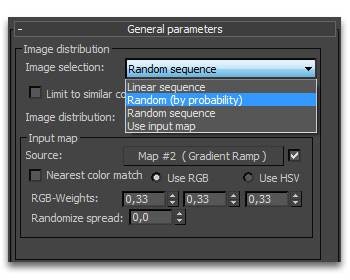
Sequence Order
- Random order will distribute the tiles randomly across the bond pattern.
- Linear sequence can be used to create repeating patterns. The loaded maps are mapped one after another, then repeated.
- Random probability can be used to define a random distribution with specific bricks/tiles appearing more or less often. The probabilities are defined in the "List Bitmaps and Probabilities" dialog.
Random Size

Random Rotation

Random Stretch-X

Random Stretch-Y

Random Distortion

Random Mirror X/Y

Random Sequence

Linear Sequence

Surface Randomization
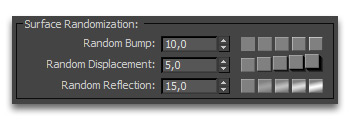
Random Bump
Random bump will vary the bump amounts for each tile by the value from 0% to 100%.
Random Displacement
Random displacement will vary the displacement amounts for each tile by the value from 0% to 100%.
Random Reflection
Random reflection will vary the reflection amounts for each tile by the value from 0% to 100%.
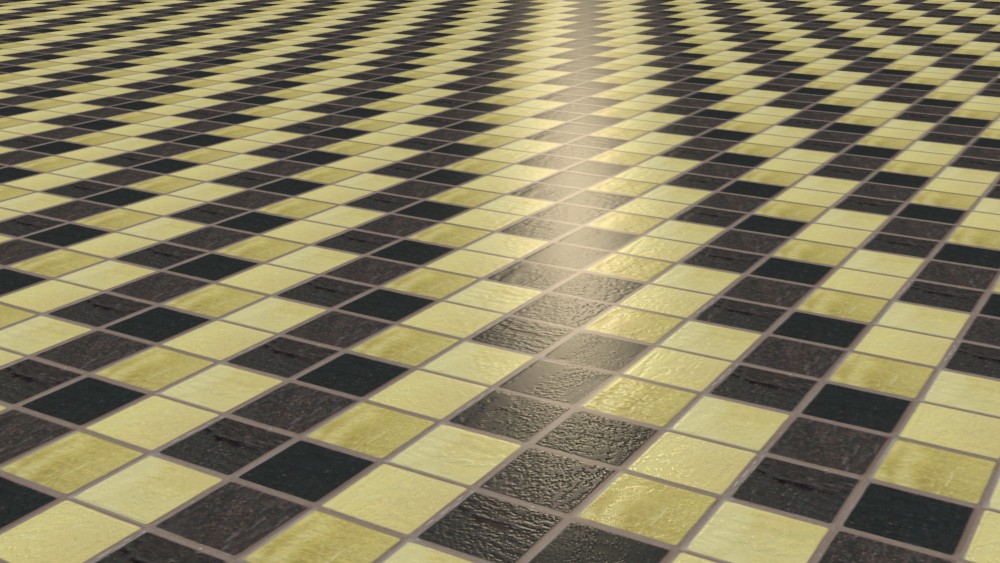
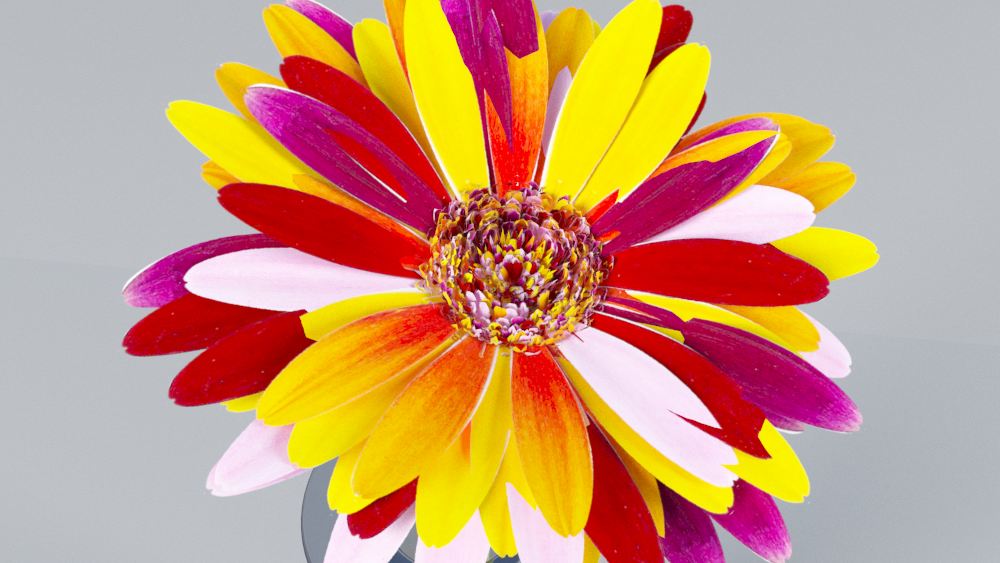
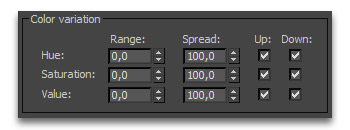
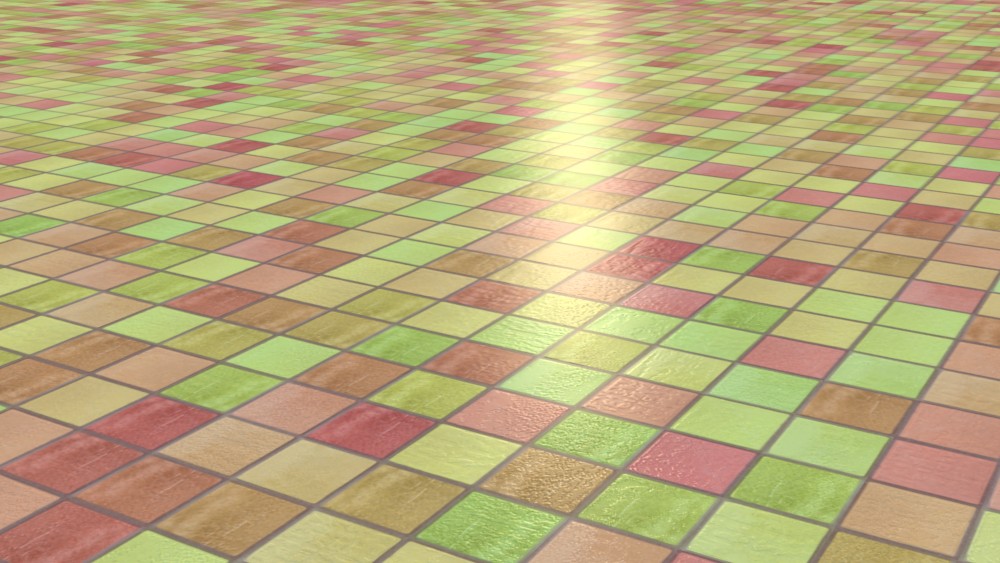
Color Randomization
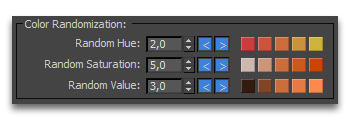
Random Hue
Random hue will vary the hue amounts for each tile by the value from 0% to 100%.
Random Saturation
Random saturation will vary the saturation amounts for each tile by the value from 0% to 100%.
Random Value
Random value will vary the dark-light values for each tile by the value from 0% to 100%.
Direction < >
The directional buttons will randomize hue, sat and val only to positive, negative or both directions.
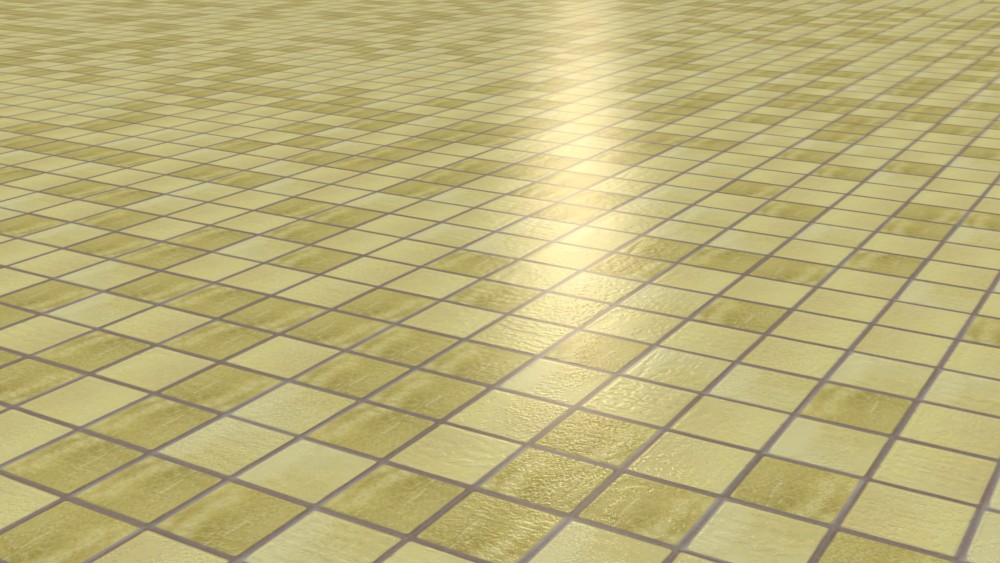
No Color Variation

Random Hue

Random Saturation

Random Value

Color Correction (Tiles only)
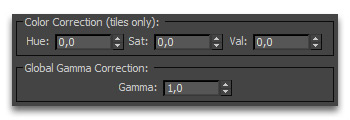
Color Correction (Tiles only)
These parameters hue, sat, val will change the tiles only, without affecting the mortar or edges (only if alpha maps are loaded).
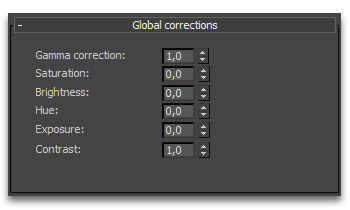
Global Gamma Correction
The Gamma parameter adjusts the output Gamma of the loaded bitmaps from 0.01 to 10. Depending on what your Input Gamma settings are in the Render Preferences, you might need to adjust the output gamma accordingly.
VRAY Displacement and Effect ID
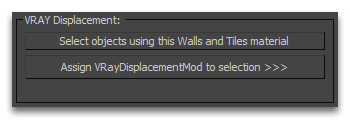
VRAY Displacement
This function adds a vray displacement modifier on top of the selected geometry and copies the displacement map from the material to the map of the modifier. It also adjusts some parameters to avoid gap on corners.
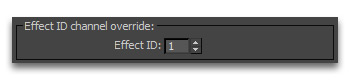
Effect ID Channel override
The Gamma parameter adjusts the output Gamma of the loaded bitmaps from 0.01 to 10. Depending on what your Input Gamma settings are in the Render Preferences, you might need to adjust the output gamma accordingly.
Compatibility
- Autodesk 3Ds Max 2021 (64 bit)
- Autodesk 3Ds Max 2020 (64 bit)
- Autodesk 3Ds Max 2019 (64 bit)
- Autodesk 3Ds Max 2018 (64 bit)
- Autodesk 3Ds Max 2017 (64 bit)
- Autodesk 3Ds Max 2016 (64 bit)
- Chaosgroup VRay renderer
- Scanline renderer
- Corona Renderer